Showing posts with label Wordpress. Show all posts
How to Redirect Automatic Error 404 Page To Homepage With JavaScript

How to Redirect Automatic Error 404 Page To Homepage With JavaScript

How to Redirect Automatic Error 404 Page To Homepage With JavaScript - It could be that a blog has an error page 404 or a page not found. Usually the page has been deleted or by other causes such as writing errors in posting URLs, and others.

Usually on a blog or web to create a page or landing page specifically for error 404 pages by giving a statement that the destination page has been deleted or no longer exists. The rest is given a button to the homepage or provided a search box to search for the desired post again.

How to Redirect Automatic Error 404 Page To Homepage With JavaScript

Now this time I will give a trick to automatically redirect or redirect the error 404 page to the compilation so that visitors do not need to click the button to the homepage. Actually, posts like this have a lot on Google, but there are some that are still difficult to implement because the script does not work in some templates, especially templates that use conditional tags for error 404 pages. So if you want to try it, you can immediately follow the following steps this.

How to Redirect Automatic Error 404 Page To Homepage With JavaScript


To automatically redirect or redirect the 404 error page to the compilation, actually it's very easy to simply copy the code below, then put the code before the code </body> or &lt;!--</body>--&gt; &lt;/body&gt;

1. For nonAMP blogs

<b:if cond='data:blog.pageType in {&quot;error_page&quot;}'>
<script>
setTimeout(function () {window.location.replace("<data:blog.homepageUrl/>");
    }, 8000); //will call the function after 8 seconds.

</script>
</b:if>

The above code will automatically redirect the error 404 page to the homepage after 8 seconds, so that visitors can still read the message on the error 404 page, you can set / replace the 8000 number to set the waiting time. 1 second = 1000.

If you want to directly redirect, use the following code.

<b:if cond='data:blog.pageType in {&quot;error_page&quot;}'>
<script>
setTimeout(function () {window.location.replace("<data:blog.homepageUrl/>");
    });
</script></b:if>

Or

<b:if cond='data:blog.pageType in {&quot;error_page&quot;}'>
<script>
window.location.replace("<data:blog.homepageUrl/>");
</script></b:if>

2. For AMP Blogs

As for blogs that use mobile URL mobile?m=1 as AMP, use the following code that will only apply to desktop URL.

<b:if cond='data:blog.pageType in {&quot;error_page&quot;} and data:blog.isMobileRequest == &quot;false&quot;'>
<script>
setTimeout(function () {window.location.replace("<data:blog.homepageUrl/>");
    }, 8000); //will call the function after 8 seconds.
</script></b:if>

Or

<b:if cond='data:blog.pageType in {&quot;error_page&quot;} and data:blog.isMobileRequest == &quot;false&quot;'>
<script>
setTimeout(function () {window.location.replace("<data:blog.homepageUrl/>");
    });
</script></b:if>

3. WordPreess

This can also be used in WordPress, please save this code in the 404.php section at the bottom.

<script>
setTimeout(function () {window.location.replace("<?php echo home_url('/'); ?>");
    }, 8000); //will call the function after 8 seconds.
</script>

or

<script>
setTimeout(function () {window.location.replace("<?php echo home_url('/'); ?>");
    });
</script>

Thus tips that I can share about tips on How to Redirect Automatic Error 404 Page To Homepage With JavaScript. Hopefully with these brief tips, it can be useful and useful for all of you. Good luck.

How to Rewrite Articles that Are Good To Be Unique and Competitive

How to Rewrite Articles that Are Good To Be Unique and Competitive

How to Rewrite Articles that Are Good To Be Unique and Competitive - The fact that cannot be denied is that most bloggers use the article rewrite technique. This is true, especially for those who have tutorial sites or news sites. How to rewrite articles or writings does look easy, but if it is not balanced with a good rewrite skill then it is the same as copy and paste.

How to Rewrite Articles that Are Good To Be Unique and Competitive

Rewrite article is rewriting articles with modifications and actions that are legalized, different from copy paste. Rewrite posts are not easy to compete in search engines !,. therefore it is necessary to use the correct method or rewrite method so that the articles are unique and able to compete in the search Serpent.

How to Rewrite Articles that Are Good To Be Unique and Competitive


For those of you who manage news websites or tutorials, they sometimes find it difficult to write rewrite. Well some of the tips below will help you:

Change language style


Language style reflects the character and character of the author, so the way to make a good rewrite article is to change the style of the language in the writing. In this case use language that is easy to understand and in accordance with your style. Apart from that, the most important thing is not to make the posting become unreadable.

Use a lot of resources


A text will be more relevant if it comes from various sources. Now find writing that matches the title you want to make, more resources are better. Don't forget to read and understand the core explanation of the source article that will be written. Logically you will not be able to change the language of the article if you do not understand the meaning of the previous article.

Add a little spice to your article


The spice intended here is additional information that you should add so that your article is different from the previous articles.

As an example:
  • Article 1: discuss the meaning of blogs, types of blogs, the purpose of blogs, how to create,
  • Article 2: discussing the meaning of blogs, types of blogs, purpose of blogs, history of blogs, how to create,

So you have to make your article better than the previous article, try to be more complete and deeper.

Keyword research


The important part for posting can compete in search results is to do keyword research. Find the most searched keywords with low competition. That way the chances of posting posts to the first page of Google will be much greater.

Here are some important keyword research points:
  • It's better to use a long tail keyword
  • Look for keywords that have low competition
  • Take advantage of Google trends to see popular topics today

Make SEO Friendly articles


Furthermore, so that the article is able to compete, apply good SEO methods to your article, both SEO on Page and Off Page. Make the rewrite article as natural as possible so that it is easy to read by visitors.

Notice:
  • Keyword placement,
  • Keyword density
  • Alt tag
  • Perform image optimization
  • Build post links (backlinks)

Modification of article titles is more unique


When you have done keyword research, you will get several long tail keywords that are suitable as titles. Making an attractive title will make a good contribution.

Example: "Keyword research: create a blog"

Results:
  • How to make a free blog
  • How to create a blog with blogspot
  • How to make money from a blog
For example, you can modify the article title to "How to create a blog on blogspot to make money"

You need to know that rewriter is better than copy paste. So it's better to write posts than copy paste. Now that's some important tips on how to create unique and quality rewrite articles. Hopefully this post is useful for all of us. Good luck.
How to Add and Use Google Tag Manager in WordPress

How to Add and Use Google Tag Manager in WordPress

How to Add and Use Google Tag Manager in WordPress - Google issued a new tool called Google Tag Manager, this tool has many benefits for various websites and also web sites built with WordPress. This Google Tag Manager like the name suggests will help you add and manage all the various scripts you use on your site in one place.

How to Add and Use Google Tag Manager in WordPress

For example, you can add various codes from:
  • Google Analytics
  • Event Tracking
  • Google Optimize
You can add all the code and can manage everything through Google Tag Manager.

In this article, I'll show you step by step how to install Google Tag Manager on your WordPress site and how to add code on your WordPress site. And then, I'll give you a quick guide on how to publish your first tag and make sure it works.

What is Google Tag Manager?


Often website owners need to add some code to track conversions, traffic, and collect other analytical data manually one by one. With Google Tag Manager, you can easily add and manage all these scripts from a single dashboard. There is a default tag template for Google Analytics, AdWords, DoubleClick, etc. Google Tag Manager also works with some third-party analytics and tracking platforms beyond Google products.

In addition, you can use custom HTML to add your own tracking or other code you want to add. It saves you time to add and remove tags from your code and manage them from the easy dashboard. Not to mention, all of these scripts are loaded in one script and one place.

Google Tag Manager will be much easier and convenient for you. And once you understand more about Google Tag Manager, you can even start using this powerful tool to collect more actionable data to inform your marketing efforts.

Sign up for a Google Tag Manager account


If you have not already done so, the first thing you need to do is sign up for a Google Tag Manager account that you can do for free. You can do this by going to here >> Google Tag Manager.

After you register, you must be in the 'Add New Account' interface. Please provide your company name:

How to Add and Use Google Tag Manager in WordPress

Then, in the 'Setup Container' section, enter your website name in the 'Container Name' field and select 'Web'.

How to Add and Use Google Tag Manager in WordPress

After you accept the Google Terms of Service, Google should direct you to the Google Tag Manager page and show two code snippets. Keep this window open because you need to add both snippets of this code to your WordPress site in the next section.

How to Add and Use Google Tag Manager in WordPress

Add a Google Tag Manager code snippet to your site


This is a rather complicated part. Previously, you only need to add a single snippet of code to the sharing of the WordPress theme you're using, but now Google Tag Manager wants you to add two snippets:
  • The first goes to the <head> of your theme
  • The second put the code right after the opening tag <body>

In addition to editing your child theme or child themes directly, WordPress does not give you an easy way to enter the code after the tag, and each theme works a little differently so I can not give you a tutorial that applies to all themes.
  • If you already feel comfortable editing your child theme or child theme files directly, you can do it.
  • If you feel uncomfortable working directly with your theme file, I'll show you two different methods you can use - beginner-friendly plugins and simplified code methods.

Use Head, Footer and Post Injector Plugins


If you're fine with dedicating plugins to Google Tag Manager, the easiest way to add them is to use free Head, Footer, and Post Injections plugins.

To get started, install and enable this free plugin. Then, go to Settings >> Header and Footer in your WordPress dashboard to access the plugin interface.

Now:
  • Paste the first Google Tag Manager code snippet into the ON EVERY PAGE box under PAGE SECTION INJECTION
  • Paste the second Google Tag Manager code snippet into the DESKTOP * box in the TAG section (do not worry - the code snippet will still be loaded on the mobile) Injections Head, Footer and Post only allow for separate code snippets if you check the mobile box)

It should look like this:

How to Add and Use Google Tag Manager in WordPress

Be sure to save your changes and you're done.

Use a Functions.Php Code Snippet


With the method of adding code on functions.php is technically not 100% optimal. This works well for most sites and not for a small portion of the site, but I'll explain what I mean after I show you what to do.

To use it all you need to do is add this snippet of code to your child childfunctions.php child theme:

add_action('wp_head', 'gtm_head_code');
Function gtm_head_code(){
?>
First Code of GTM Interface
<?php } add_action('wp_footer', 'gtm_body_code'); Function gtm_body_code(){ ?>
Second Code of GTM Interface
<?php
}

Be sure to replace the placeholder with the actual code snippet.

So why is this method not 100% optimal?

Since this method places a second snippet of code in the footer, not after the opening tag, your tag may not be activated if the visitor does not fully load your page. That's why Google recommends that you add as high code as possible on your site. But for most sites? This method is really good.

Testing to Ensure Your Code Snippet Works


To make sure you install Google Tag Manager correctly:
  • Open the free GA Checker tool
  • Enter your website URL
  • Click 'Check Your Site'

Go to the 'Tag Manager' tab menu in the results and look for the green checkbox in the 'Tag Manager' column:

How to Add and Use Google Tag Manager in WordPress

If you see it - congratulations! You installed the Google Tag Manager script correctly on your WordPress site. Now, let's learn how to use Google Tag Manager to create your first tag.

Creating Your First Tag


After adding the code snippet to your site, you can go back to the Google Tag Manager page and create your first tag.

"Tags" is essentially a special script that you want to paste into your site with Google Tag Manager.

To get started, click on 'New Tag' in your Google Tag Manager dashboard:

How to Add and Use Google Tag Manager in WordPress

By clicking 'Tag Configurations', you can choose what type of tags to create. Google includes all types of pre-installed options for things like Google Analytics, Google Optimize, and many other third-party services.

But you can also use the 'Custom HTML' or 'Custom Image' tags to include code on the client side:

How to Add and Use Google Tag Manager in WordPress

After you select 'Tag Type', you need to configure it to follow the settings. Then, you can click on the 'Triggering' section to choose when to "activate" your tags. The default is All Pages, but you can also get more targets to your liking by clicking on the + icon:

How to Add and Use Google Tag Manager in WordPress

Once you've done everything, click 'Save'.

Publish your Container


Now, all you need to do to make your tag alive is to publish your Container. To do so, click the 'SUBMIT' button in the Google Tag Manager interface:

How to Add and Use Google Tag Manager in WordPress

Then, enter Version Name and Descriptions Name. I suggest you make this as detailed as possible to help with later version control. That is, explain which tags you have added and what they do. Then, click PUBLISH:

How to Add and Use Google Tag Manager in WordPress

And you just published your first tag.

How to Test Individual Tags work


If you want to make sure every tag in your 'Container' is enabled, Google offers a free browser extension for Chrome called Tag Assistant.

Resources To Help You Become a Google Tag Manager Pro


Currently, you have successfully added Google Tag Manager to WordPress. But Google Tag Manager has enough in-depth functionality and explains the large number of interface options that go beyond the scope of this article. So now that you've installed Google Tag Manager, you can learn more about the interface in Google Tag Manager.

And that's the guide on how to add and use Google Tag Manager in WordPress. Hopefully this article useful for you and good luck.
Tips Increase Speed Loading WordPress with WP Compress

Tips Increase Speed Loading WordPress with WP Compress

Tips Increase Speed Loading WordPress with WP Compress - Having a website or blog that says good not only because it has interesting content, but a website that has a very good speed when loaded is also a mandatory requirement that you must have. Because you need to know that every visitor will use different criteria to judge whether your website is really good in many ways.

There are many factors that can affect the loading time of your website, in addition to using the best hosting for WordPress, you also have to optimize the images on your website because using high resolution images is one of the causes of the long loading of websites.

Tips Increase Speed Loading WordPress with WP Compress

If you are a WordPress user, then to optimize the image becomes lighter when loaded but does not reduce the quality of the image is very easy, because many plugins that work to Optimize Images with ease. One image optimization plugin with good image compression is WP Compress.

In this article I will discuss completely about the plugin to improve WordPress loading speed by way of compressed images with WP Compress.

Why Do You Need to Optimize Images?


Most visitors are impatient with loading old websites, even though they find your website in search engines and visit your website then know the website loaded very long then most of them will immediately close your website and search for information from other website.

Abandoned visitors because loading the old website will be very detrimental especially if your website is used for business purposes, of course how many potential customers you lost. Plus if you spend money on advertising campaigns and leave your website when they arrive, of course you will also lose money financially.

Optimizing images is the easiest way to increase your website loading speed. With a fast website that will give many positive impacts to your website, in addition to happy visitors, saves a lot of bandwidth and saves your server storage space capacity, this will also improve SEO because search engines have algorithms that rate website speed for search results.

What is WP Compress?


WP Compress is a free WordPress plugin that works for image optimization with just one click with high compression level and small image results but still good quality compression. By optimizing your images, you can improve load time, increase PageSpeed Score, and increase conversions.

The WP Compress plugin also claims to be a better and free alternative to other image optimization plug-ins, such as WPMUDEV's Smushit or EWWW Image Optimizer.

WP Compress is a plugin that provides one-click bulk compression, unlimited cloud backups, automatic night image optimization and exclusive PowerUps at very cheap starting price of $ 1 / month.

With WP Compress you can easily:
  • Shrink file size while maintaining quality
  • Resize image to get maximum size and quality
  • Optimize all images on your WordPress website in one click
  • Images can be restored to their original size at any time

How to use WP Compress in WordPress


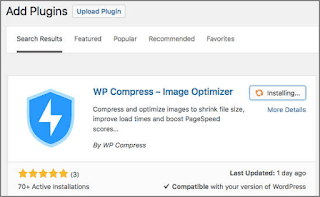
To optimize your images on the WordPress site, please install the WP Compress plugin by logging in to your WordPress admin Plugins >> Add New, type the plugin name" WP Compress "and click on the "Install" button.

How to use WP Compress in WordPress

Once the plugin is installed, please enable the plugin and you will see a new menu item added with the name "WP Compress" in your WordPress admin sidebar.

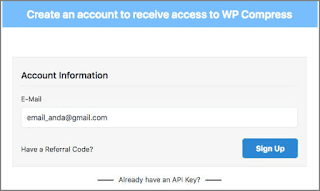
Next please click WP Compress and you will be faced with a page that requires you to register to get API Key WP Compress. Please enter your email and click "Sign Up".

How to use WP Compress in WordPress

You will receive a new email from WP Compress containing the information and click on the "Get Your API Key" button to get your API Key, please copy the API Key and log back into WP Compress settings.

How to use WP Compress in WordPress

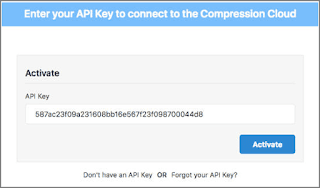
Please enter the API Key in the available fields and Activate the plugin by clicking the "Activated" button.

How to use WP Compress in WordPress

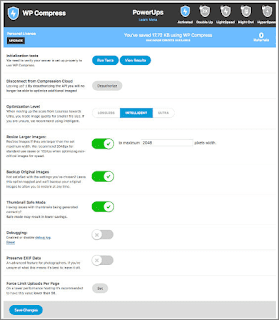
After the WP Compress plugin is enabled, you will be taken to the settings page where you can configure the plugin, and following the configuration recommended by WP Compress for maximum results:

How to use WP Compress in WordPress

WP Compress recommends optimizing smart mode by resizing toggled to 2048px, providing ideal balance of speed and quality and keeping your images big enough for retina devices and not loading unnecessary pixels. WP Compress usually recommends resizing all images to a maximum of 2048 pixels and possibly smaller. However, background images must be excluded from size to prevent stretching on larger devices. WP Compress offers unlimited cloud backups and strongly recommends keeping it in the ON position so you can restore your images anytime if needed and compress on alternative settings.

For some low-budget shared hosting or hosting servers, we recommend using safe mode for thumbnails (Safe mode thumbnails) because budget providers may be late when downloading optimized images. Safe mode introduces improvements to this; However, it can produce slightly less optimized thumbnails. After the plugin is already configured or you can leave it by default. You can now log in to WordPress Library to optimize the image by compressing all images with WP Compress.

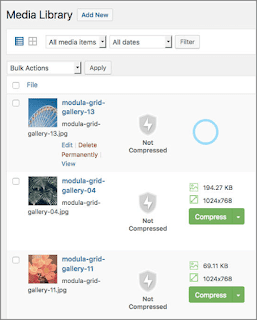
To compress the image, you just need to click the "Compress" button beside the image list and wait a few moments then the image will be automatically resized to be smaller and lighter so that loading your WordPress website loads quickly. In addition, to restore the image at normal size, you just click on the "Restore" button and the image will be restored on the original version.

How to use WP Compress in WordPress

For quick way and WP Compress to compress the image as a whole, you can simply click Media >> Bulk Compress and click" Compress "button. And to restore the overall picture, please click Media >> Bulk Restore and click" Restore "button.

How to use WP Compress in WordPress

WP Compress plugin is proven to optimize the image and compress the image reaches 90% so the image really has a small size and lightweight when loaded.

Price WP Compress


WP Compress is a free plugin and you can download directly on WordPress.org, but this plugin also has a premium version where you will get more features and also get more quota images to be compressed each month.

Price WP Compress

Here is the price list from WP Compress Pro:

Membership
  • Personal $ 1 / month: 1 Website, 1000 Images, + 1,250 Credit Starter Pack
  • Professional $ 3 / month: up to 3 Website, 5000 Images, + 5,000 Credit Starter Pack
  • Professional Pro $ 5 / month: up to 10 Website, 10000 Images, + 10,000 Credit Starter Pack

Lifetime
  • Bronze $ 15 / month: Unlimited Websites, 500 images / month for Life, + All Pro Features & PowerUps
  • Silver $ 20 / month: Unlimited Websites, 1000 images / month for Life, + All Pro Features & PowerUps
  • Gold $ 25 / month: Unlimited Websites, 2500 images / month for Life, + All Pro Features & PowerUps

One Time: $ 1/1000 Images

Interested to buy it, just go here

So the conclusion is that by doing image optimization on your site it will not make your site magically load within milliseconds, compressing this image is one of the many ways you can use to make your website load faster.

With WP Compress you will also save your time in optimizing images quickly and easily, in addition to compression image results are also still in the category of quality with slim size results. Price WP Compress offered for premium version is also very cheap with price plans vary.

And that's my full review of the WP Compress plugin. Hopefully with this short article about Increase Speed Loading WordPress with WP Compress, can be useful for you and good luck.
What is WordPress Self Hosting and What are the Advantages?

What is WordPress Self Hosting and What are the Advantages?

What is WordPress Self Hosting and Advantages - Frankly so far I only know and more familiar to use blogspot to write a blog, for the problem utak atik templates yes limited to the important course can be more leverage and light to access. Experience using Wordpress self hosting of course make surprise, because flatform is much different from blogspot. Features that are in it could make confused, because too much and not used. Maybe this is also felt by some of you who are still using wordpress flatform, especially wordpress self hosting.

WordPress Self Hosting and Advantages

WordPress is one of the platforms like the website of its own that loved many internet users. WordPress has two types of services, namely free (free) service and self host service (which requires a fee). This cost may arise because we hire hosting or VPS for ourselves.

What is WordPress Self Hosting?


WordPress self hosting is a wordpress that is hosted by our own party through a hosting service provider that we can rent, we just download CMS wordpress from wordpress.org. So different if using wordpress.com is still in hosting by wordpress party that is bound by certain rules.

Among them is not able to change the theme freely, except Theme provided by the wordpress.com most paid. By using wordpress self hosting, we are free to use free themes that are widely available outside, and we can download it for free as well.

Of course using paid wordpress with no paid has a difference. One difference is your wordpress address. Free WordPress ends with ".com" while paid wordpress ends with ".org". Not only has the difference in terms of address, paid wordpress also has more advantages. Here are the advantages of self hosting wordpress:

The advantages of WordPress Self Hosted


1. Full Control and Perfect

You will have full control of your wordpress. Especially in the content section. You can easily turn wordpress into any platform you want. Creating wordpress into a great website without restrictions to upload articles into wordpress is one control that you will not find in wordpress without pay or free. In wordpress without pay, you have limitations in uploading articles and if there is a violation, your wordpress account can be locked.

Performance offered by self hosted wordpress is also better and more perfect. But the user must really understand how to manage wordpress well. You can add features on blogspot.com in self hosted wordpress.

2. No Binding Rules

In free wordpress, you will find various possibilities your platform should be deleted or locked. Many rules on wordpress that threaten the continuity of your platform. With self hosted wordpress, you do not have to fear your platform is deleted or locked.

There are also restrictions on installing themes, or plug ins. By using self hosted wordpress you can upload the theme and install the plug in at will. No limits on quantity. You can also edit the script in accordance with the wishes of wordpress owners.

3. Good For Business

Using self hosted wordpress as your business platform will have many advantages.
  • Make your wordpress look more professional. This is done as one of the added value in branding competition. If your wordpress look more professional than other wordpress, it will increase consumer confidence to you and will make wordpress more prominent than others
  • WordPress can be registered on Google Adsense. You can register your wordpress into a Google Ads publisher that is enough to capture a lot of income. But you also still have to pay attention to the content, appearance, and management of wordpress for more interesting.
  • Free to advertise on wordpress. Incomplete it if your wordpress is not fitted with ads. With self hosted wordpress, will allow you to advertise. Like Google adsense, Adiquity, Chitika, Infolinks and others.

So of the three advantages of self hosting wordpress above must have provided an idea that wordpress is very professional. So for you the bloggers do not hurt to try to use wordpress and feel the sensation.

Quite a few articles that I can share this time about WordPress Self Hosting and Advantages. Hopefully with this short enough article can be useful and useful for you.
What is Alt Tag and its effect on SEO? This is the answer

What is Alt Tag and its effect on SEO? This is the answer

What is Alt Tag and its effect on SEO? This is the answer - To create Quality SEO Content then you need to do optimization. Image Optimization is part of SEO on page that is useful to boost your blog ranking in search engine results. By adding alt tags and alt image titles will be more easily understood by search engine robots.

Alt tags or the so-called "alt description" are HTML attributes used as tags in images (alternate text) for images to be easily understood by search engines. Adding alt tags to blog post images can add SEO value to your posts.

What is Alt Tag and its effect on SEO

The real function of alt tags


Basically search engine robots are very difficult when understanding an image that does not have an alt attribute, so the image can not be crawled properly. Alt tags are the best way for images to be more easily understood by search engines. Thus the image will appear in the search results when someone writes the same keywords that are placed on the image.

So essentially alt tags are very influential on ranking or image position in search results. The more relevant and good alt tags that are added to the image the greater the likelihood that images will appear on search engines. In addition, alt tags are useful for substituting images to form text when the process of loading images on web pages is too heavy.

Tips on adding alt tags to images

  • We recommend using an optimized image,
  • Alt tags should contain keywords,
  • Not too long, the point is short but contains targeted keywords,
  • Then alt tags should be relevant or appropriate to the image.

How to add alt tag to post image


1. Platform Blogspot
  • First upload the image first,
  • When you finish "select property",
  • Then input the appropriate words.

  • How to add alt tag to post image

2. Platform WordPress
  • Upload an image,
  • Then the next contents on the description of the image,

  • How to add alt tag to post image

To apply good On Page SEO techniques you need to understand how to maximize alt tags on images. Thus the content or posting will have a good SEO value in the eyes of search engines so it can appear on the first page.

Thus the discussion that I can say about What is Alt Tag and its effect on SEO. Hopefully with this short enough article can be useful and useful for you. Good luck.
How to Receive Digital Currency Payments in WooCommerce with CryptoWoo

How to Receive Digital Currency Payments in WooCommerce with CryptoWoo

How to Receive Digital Currency Payments in WooCommerce with CryptoWoo - Cryptocurrency or the digital currency of the last few years has become very interesting to discuss because this digital currency becomes an easy payment solution, fast, secure and support worldwide without the need to pass the authority of financial services such as banking and others.

Cryptocurrency becomes very interesting and hunted by many people around the world because it has a rapidly changing value, for example is a bitcoin digital currency where when it first appears the value of 1 bitcoin is only $ 22 and now rose to $ 6.603 or equivalent to 95 million rupiah. Seeing that, a lot of digital currency hunters not only use digital currency as a means of payment but also for investment, although also this digital currency has the potential to decline in value quickly because the basic value of pure cryptocurrency based on the power of buy and sell is not guaranteed by any.

With the development of cryptocurrency or digital currency that is so fast and rapidly, this could make cryptocurrency as the first choice in the future as a tool in the process of purchasing, paying and transferring funds to old systems. Therefore you should not miss this digital currency to be present on your online store website as the preferred currency for the payment system. By adding a digital currency payment system, in addition to facilitating a fast, secure and easy process, this can be the fastest way for you to accumulate digital currencies.

How to Receive Digital Currency Payments in WooCommerce with CryptoWoo

In this article, I will introduce you a WordPress plugin that can help you to easily receive payments from multiple digital currencies at your WooCommerce online store. The plugin is CryptoWoo (Cryptocurrency Payment in WooCommerce).

What is CryptoWoo?


CryptoWoo is a WordPress plugin made specifically for adding digital currency or cryptocurrency payment features at the WooCommerce online store. This plugin gives you full control over payment processing, customer data, and private key. This allows you as an online store owner to receive payments with Bitcoin digital currencies and other popular cryptocurrencies such as (Bitcoin, Dogecoin, Litecoin, BlackCoin, Bitcoin cash, Dash and Vertcoin) easily at your WooCommerce online store.

The CryptoWoo plugin does not remove the default payment system from WooCommerce, but just adds a feature for your online store to receive payments in digital currency and CryptoWoo in real time can display conversions or digital currency exchange rates of your product prices.

CryptoWoo's main plugin uses Block.io and Wallet API services. All data stored in Block.io is encrypted and uses a multi-signature wallet built on top of a hierarchical deterministic wallet. It's not possible to move your unmarked coins as an online shop owner.

CryptoWoo also offers to users some addon both paid and also free, one of the addons of CryptoWoo is the HD Wallet Add-on which is useful to reduce external effects even further. This allows sales revenue to go directly to your storage wallet without any involvement from a third party.

In addition to direct control over payments, Add-on HD Wallet also adds support for Segregated Witness on Bitcoin and Litecoin as well as more currencies like Dash, Bitcoin Cash, and Vertcoin. Additional currency can be added through free add-ons.

Price CryptoWoo


CryptoWoo is a premium plugin, where you have to purchase a license to use this plugin. But you need to know that CryptoWoo only charges fees on their plugins and does not take advantage of every transaction in your online store.

Here's a list of pricing plans for CryptoWoo:
  • Annual license: There are three types of annual licenses ranging from $ 34 for a single store, $ 49 for 3 online stores and $ 99 for premium licenses that can be used up to 25 online WooCommerce stores. With this annual license you will get plugin updates and full support for one year.
  • One Time Payment: CryptoWoo also provides one-time buy licenses, where you only have to pay once and get all CryptoWoo licenses including updates and support forever. Prices start at $ 99 for one online store, $ 149 for 3 online stores, and $ 299 for premium up to 25 online stores.
The Premium License gives you access to the source code repository and is likely to affect the implementation of new features and improvements. If you are interested to buy it, just go here

CryptoWoo Features


CryptoWoo is a digital currency payment plugin for WooCommerce. This plugin is very interesting and brings many features that can facilitate you in receiving payment in digital currency (cryptocurrency), and here are some excellent features that you will get from CyptoWoo:

Keep the user on your website

The entire payment process with digital currency takes place in your store. This means that there is no customer redirection to another website or providing your customer data to a third party provider.

Live Exchange Rate Feed

CryptoWoo can instantly convert your product and shopping cart prices directly into multiple digital currencies supported by real-time exchange rates from multiple exchanges. So with this plugin, customers can directly see how much the product price will be purchased in the updated digital currency price. You also do not need to manually renewal prices in digital currency.

Fast payment processing

CryptoWoo uses transaction metrics from BlockCypher and Block.io and detects "green transactions" Block.io (account required), it aims to reduce the risk of receiving zero confirmation payments.

No middleman fees

Network costs are part of the network design of the most decentralized cryptocurrency. CryptoWoo does not at all charge the operational costs of the transactions you make at your online store, CryptoWoo only takes a fee for an annual plugin license.

HD Wallet Addon

CryptoWoo has Addon HD Wallet, where the digital wallet allows you to receive payments directly to the address under your control without relying on third party services that handle your private key.

Secure API

CryptoWoo main plugin using Block.io free API & wallet service. All data stored on their service uses encryption that disables access by Block.io. Multi-signature wallter makes it impossible to move coins without a trader's signature.

No full node required

Receiving payments in various digital currencies using CryptoWoo enables traders to control their coins but does not require overhead handling of large blockchain data storage.

Payment forwarding

CryptoWoo payment forwarding feature can be used to automatically forward sales revenue to personal desktop wallet client, paper wallet or cryptocurrency currency exchange. (Block.io premium account required)

Flexible Settings

CryptoWoo is very easy to use, you can set various Refund address, price & markup discount, custom order deadline, auto order completion, default payment currency - a variety of different options lets you customize the plugin to your needs!

Shapeshift Integration

CryptoWoo also allows you to receive a variety of digital currencies other than the main digital currencies shown, because in addition to the three natively supported currencies you can use the shifty key to receive all altcoins supported by Shapeshift.

How to Use CryptoWoo in WordPress


To start receiving digital currency (cryptocurrency) payments in your WooCommerce online store, the first thing you need to do is to install the CryptoWoo plugin. If you have already purchased the license and downloaded the CryptoWoo plugin.

Do install the CryptoWoo plugin from your computer device and activate the plugin.

Once the CryptoWoo plugin is enabled, a new menu item will appear in your WordPress admin sidebar under the name 'CryptoWoo Payments'.

Please enter the configuration menu in CryptoWoo Payments »Configurations» Checkout flow Configurations, please activate the 'ON' button on 'Enable / Disable Payments Gateways'. And do not forget to click the 'Save Changes' button at the top right to save your changes.

How to Receive Digital Currency Payments in WooCommerce with CryptoWoo

Next go to Wallet Settings >> Block.io, and enter the API key for the digital currency you use like Bitcoin, Dogecoin, or LiteCoin. Block.io accounts are only necessary if you do not use the Add-on HD Wallet. And click the 'Save Changes' button.

How to Receive Digital Currency Payments in WooCommerce with CryptoWoo

Next go to Payment Processing >> Blockchain Access, please select the payment processing API that will be used to check blockchain for incoming payments.

How to Receive Digital Currency Payments in WooCommerce with CryptoWoo

The last step is to log in to Database Actions, please disable the internal WordPress cron and set external cronjob according to the instructions on the page or request help from the CryptoWoo support team to do so.

How to Receive Digital Currency Payments in WooCommerce with CryptoWoo

And that's the easy steps to setup and configure the CryptoWoo plugin on your WordPress site.

Now please look at the front of your WooCommerce online store site, now has a digital currency payment system feature, you can already receive payouts with bitcoin or other digital currencies. And here is a screnshoot to display your shopping cart with a cryptocurrency payment system.

How to Receive Digital Currency Payments in WooCommerce with CryptoWoo

In the checkout page section, buyers will see a payment method with 'Digital Currency' added and they will see the price of total products purchased on direct conversion to multiple digital currencies, and buyers only need to choose the digital currency to pay for the product You are in the 'Payment Currency' section.

How to Receive Digital Currency Payments in WooCommerce with CryptoWoo

In the next process on the Pay for Order payment page, buyers can view the page with digital details details that will be sent and the address code for your bitcoin.

How to Receive Digital Currency Payments in WooCommerce with CryptoWoo

And then on the order part is accepted or order has been done then the buyer will see the page as follows:

How to Receive Digital Currency Payments in WooCommerce with CryptoWoo

And that's it then the purchase process with digital currency payment method is done by the buyer quickly and easily.

In addition, CryptoWoo also features a 'WooCommerce Currency Switcher' widget that allows customers to easily view price lists converted to digital currencies directly and updates before they make the purchase process.

So the conclusion is that CryptoWoo has come as an easy solution for WooCommerce online shopkeepers in receiving digital currency payments (cryptocurrency), it can also be a great way to collect digital currency from selling your product.

With this plugin you only need to buy an annual license or license forever for the purchase of plugins at a cheap price and no discounts from your store transaction process for CryptoWoo, of course this will greatly benefit you and the continuity of your business. Also with CryptoWoo you can have more control over your checkout process, customer data, and private key.

For the owner of WordPress online store with WooCommerce, this is a good time for your online store to have an easier, practical and quick payment system feature by receiving payment in Bitcoin, Litecoin, Dogecoin and other digital currencies from all over the world.

And that's my complete ultimate about CryptoWoo plugins, plugins that can help you get paid in digital currency (cryptocurrency) in your WooCommerce online store. Hopefully this article useful for you and good luck.
How to Create a Sticky Widget in WordPress

How to Create a Sticky Widget in WordPress

How to Create a Sticky Widget in WordPress - Surely you've come across a blog that uses sticky widgets. I used to wonder when visiting a site that if the page scroll down the widget will move down. There are so many advantages to make sticky widget in wordpress. One of them is that blog visitors can always see the widgets installed. Then sticky widgets are often used to increase ad revenue. So with ad widgets that move following the screen can increase the likelihood of people clicking on ads.

How to Create a Sticky Widget in WordPress Responsive

If I have previously discussed about How To Make Widget Following Scroll Or Sticky Widget on Blog Sidebar created for Blogger, but this time I will try to share it for WordPres which is about How to Create a Sticky Widget in WordPress. Basically the way is very easy and simple, If interested, just follow the steps below.

How to Create a Sticky Widget in WordPress


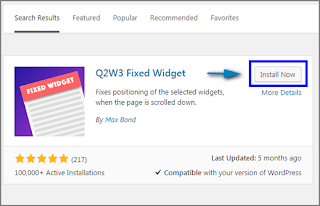
In order to sticky widgets on WordPress more responsive and not error when accessed, then you can use a plugin that is Q2W3 Fixed Widget plugin. This is a free and also popular plugin that is widely used by bloggers, please install it with the following steps:

  • First install the Q2W3 Fixed Widget plugin.

  • How to Create a Sticky Widget in WordPress Responsive

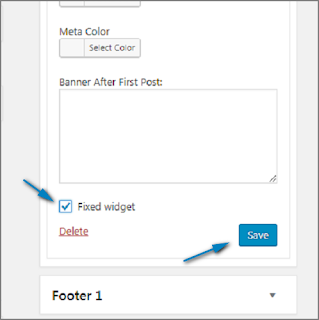
  • Next will appear setting "fixed widget" on each widget installed on your blog.
  • Then if you want to make a widget to sticky then you just click on the widget settings check.

  • How to Create a Sticky Widget in WordPress Responsive

  • When finished click Save.
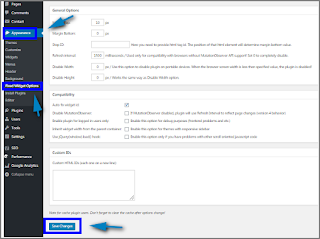
  • For the settings on the Appearance >> Fixed Widget Options.

  • How to Create a Sticky Widget in WordPress Responsive

Very easy is not how to install sticky widget in WordPress? Next please you practice yourself. I used to use sticky widgets for adsense ads and sometimes for the popular post widget in order to increase adsense income and facilitate the navigation of visitors of this blog.

A few tutorials from me on How to Create a Sticky Widget in WordPress. Hopefully with a fairly short article this article can be useful and useful for you. Good luck.
How to Create a Website Review in WordPress with WP Review

How to Create a Website Review in WordPress with WP Review

Create a Website Review in WordPress with WP Review - WordPress is a platform that you can use to build sites for various types. With the help of free plugins and premium WordPress sites can be a powerful and multifunctional site. This time I will show you how to create a review site for WordPress. If you want to build a site reviewing or reviewing a product be it digital products or other products you can use the WP Review plugin.

How to Create a Website Review in WordPress with WP Review

What is WP Review?


WP Review plugin is a free Mythemeshop free plugin, you can download directly from your WordPress dashboard as it is available in the WordPress.org plugin library. The WP Review plugin is an easy yet powerful way to easily review content, without affecting the speed of your site. If you are a blogger, you may occasionally want to review products, services, tools, recipes, or other content on your site.

With this plugin you can also increase user interaction on your website to review each other's product / service / other things. Or maybe you are running an affiliate online business you can also use this plugin to review the product in detail, so that visitors before buying the item, they will see the full review first. This is a great way to increase your sales in the affiliate business.

How To Use WP Review in WordPress


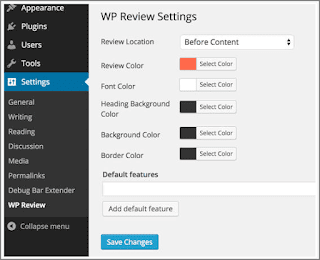
To use this plugin all you have to do is to Install and enable the WP Review plugin. Once your plugin is enabled, you can directly use the plugin or if you want to make settings can go in the settings menu plugin in Settings >> WP Review.

In the settings of this plugin is very simple because you only need to set the color for review views and location placement reviews that will be displayed on the article. And if it is, please save the settings by clicking the 'Save Changes' button.

How to Create a Website Review in WordPress with WP Review

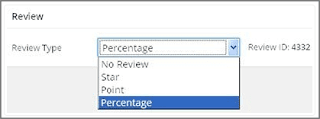
After that create a new post "Post" >> "Add New Post". Look under the WordPress editor area and you will see the Review menu.

On the menu there are 3 options: Star, Point and Percentage. In this example I will select percentage or the result will be displayed in percentage form.

How to Create a Website Review in WordPress with WP Review

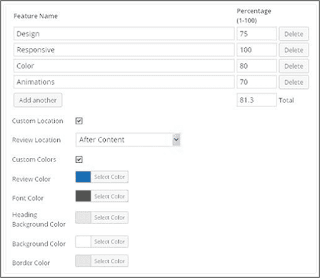
After you select Review Type then it will show column review, and you can start to fill reivew, in the example below I use the example to review a template. I enter a category that is rated in 'Featured Name' and the value of each category under 'Percentage'.

Not only that, you can put this review before the article or after the article, you can set the position on the menu 'Cutom Locations'. And you can choose a color that you can use on custom color. as shown below.

How to Create a Website Review in WordPress with WP Review

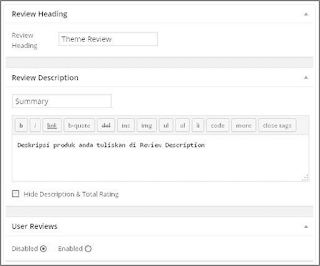
The last step you can write a description of your review in the 'Review Descriptions' column. In addition you can also allow visitors to do a review if you want it by enabling the option to be 'Enabled' in the User Reviews section.

How to Create a Website Review in WordPress with WP Review

Here's how to build a review website with WordPress using MyThemeshop's WP Review plugin. You can see the results in the picture below.

How to Create a Website Review in WordPress with WP Review

And that's a short guide How to Create a Website Review in WordPress with WP Review. Hope this article useful and helpful to you. good luck.
How to Add a GDPR Checkbox in Contact Form and WordPress Comments

How to Add a GDPR Checkbox in Contact Form and WordPress Comments

How to Add a GDPR Checkbox in Contact Form and WordPress Comments - Perhaps you've been getting emails frequently from various services that tell you about privacy policy updates from their websites that describe their privacy policy and the websites they run already have GDPR. However, of course most of you still feel confused about what it is GDPR, and how it will impact on your WordPress site? GDPR stands for General Data Protection Regulation which is EU law.

How to Add a GDPR Checkbox in Contact Form and WordPress Comments

So in this article I will give you a complete guide how to add GDPR checkbox in Contact Form and WordPress comment field using WP GDPR Compliance plugin.

What Is WP GDPR Compliance ?


WP GDPR Compliance is a plugin that helps you as a WordPress site owner for any purpose whether blog, business or online store to comply with EU privacy regulations known as GDPR. On May 24, 2018, your website or online store must comply with the GDPR regulations to avoid large fines penalties.

WP GDPR Compliance currently supports the Contact Form 7 (> = 4.6) plugins, Gravity Form (> = 1.9), WooCommerce (> = 2.5.0) and WordPress Comment. Support for other plugins will follow soon. And plugins will continue to be updated and developed over time.

Note: Enabling this plugin does not guarantee you are fully compliant with GDPR rules. please contact your GDPR consultant or company law to assess the required measurements.

How With Cookie?


Cookies are protected by EU law called ePrivacy Directive (2002) and are mentioned once in GDPR. You may already have a 'cookie wall' or 'cookie consent bar' in place on your website but because GDPR is understood now it requires your cookie notification to be a clear affirmative action (click instead of scroll for example) and need approval to be easily revoked as given.

Future updates from this WP GDPR Compliance plugin will come with cookie notifications that conform to GDPR rules. Since this plugin currently does not have this feature it is strongly recommended to use other plugins to display cookie notifications.

How to Add Box GDPR In WordPress


Before you use this plugin, we recommend you create a good privacy police page that complies with the main rules described by GDPR.

Next to adding a GDPR checkbox in WordPress, the first thing you need to do is to install and activate the WP GDPR Compliance plugin. You can install directly through your WordPress admin at Plugins »Add New and type in the keyword 'WP GDPR Compliance'.

How to Add Box GDPR In WordPress

Once your plugin is installed and activated, you will see a new menu item named 'WP GDPR Compliance' added to the Tools submenu. Please access the WP GDPR Compliance menu so you will see the settings page as shown below.

How to Add Box GDPR In WordPress

Now all you need to do is enable the GDPR checkbox in the area you want. In those settings will appear several settings depending on what plugins you activate to collect user data.

On the 'Integrations' tab menu in this example I only use the Contact Form 7 and WordPress Comments plugin. To activate, you only need to press the activation key from 'NO' to 'YES'. You can change the posts contained in the column in accordance with the wishes you know let by default. And click the 'Save Changes' button to save your changes.

How to Add Box GDPR In WordPress

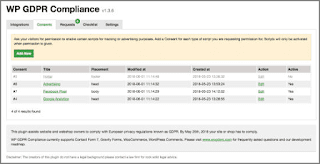
In the 'Consents' tab you can here request permission for your visitors to enable certain scripts for tracking or advertising purposes such as Google Analytics, Advertising, Facebook Pixel and more. Add Approvals for each type of script you want to run. The script will only be activated when permission has been granted.

How to Add Box GDPR In WordPress

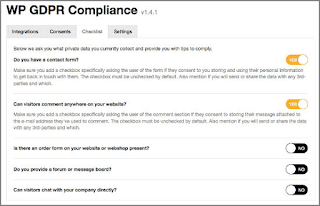
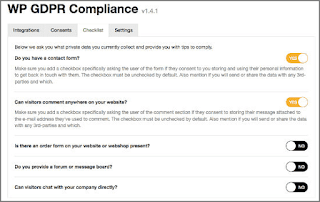
On the 'Checklist' tab you will be asked what personal data you currently collect and the plugin will give you tips for sticking to it. You can activate the option according to any form you use.

How to Add Box GDPR In WordPress

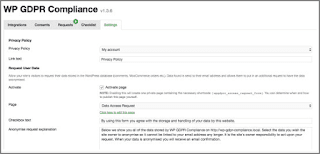
On the 'Settings' tab you just need to redirect to your privacy police page. And there is also the option to enable 'Request Data' and 'Consents'.

How to Add Box GDPR In WordPress

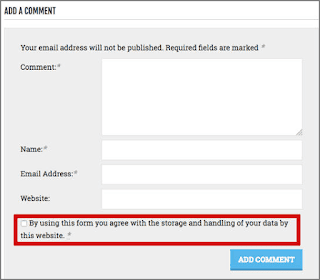
Now that you are done in the WP GDPR Compliance plugin settings page, you can directly view your site and notice in the contact form section and your comment field that now have checkboxes that should be checked by your users when they will post comments or contact you via the form contact.

How to Add Box GDPR In WordPress

And that's the guide How to Add a GDPR Checkbox in Contact Form and WordPress Comments. Hopefully with this article can help you comply with GDPR regulations and avoid fines. Good luck and thanks for visiting.